Hello, friends.
As promised, I'm back with another post showing a layout that I'll be displaying on the classroom wall at Michael's. It's another simple one which helps promote my Scrapbooking 101 class that I teach.
Doesn't he look happy? How exciting the first day of school is. It's so full of promise. Well, at least it was for me; I liked school. Especially after a long, boring summer, I was itching to get back to school.
I like the bright colors of this layout The colors and Logan's big smile make me happy.
Here's wishing you all a bright day!
Showing posts with label scrapbooking. Show all posts
Friday, March 8, 2013
Thursday, March 7, 2013
On Display
Hi, everyone.
We are bracing for yet another snow storm tonight into tomorrow. Naturally! Tomorrow is my birthday and it usually snows on my birthday. Oh well, such is the life of a winter born baby. I can tell you this, snow or no snow, I'm going to be celebrating this weekend! Bring on the fun and alcohol!!!
As some of you may know, I teach scrapbooking classes at a local Michael's craft store. My store manager asked me to bring in some layouts to be displayed on the classroom walls. The below layout is one that will be placed in a shadow box and displayed on the wall.
I like this layout even though it's simple. First, it's blue and we know how much I love the color blue. Second, because seeing Logan that little brings back so many memories of my sweet little baby. Oh, why do they have to grow up? boo hoo!
I crocheted the yellow flowers. That blue circle was created by one of my dear online scrappy friends when we did a swap some years back and I thought it was perfect for this layout because of the butterfly on it that matched my background paper. (I hope the talented creator will forgive me for forgetting who actually made it and remind me.)
I'll post again with the other layouts that will be displayed in the classroom at Michael's.
Enjoy your day!
We are bracing for yet another snow storm tonight into tomorrow. Naturally! Tomorrow is my birthday and it usually snows on my birthday. Oh well, such is the life of a winter born baby. I can tell you this, snow or no snow, I'm going to be celebrating this weekend! Bring on the fun and alcohol!!!
As some of you may know, I teach scrapbooking classes at a local Michael's craft store. My store manager asked me to bring in some layouts to be displayed on the classroom walls. The below layout is one that will be placed in a shadow box and displayed on the wall.
I like this layout even though it's simple. First, it's blue and we know how much I love the color blue. Second, because seeing Logan that little brings back so many memories of my sweet little baby. Oh, why do they have to grow up? boo hoo!
I crocheted the yellow flowers. That blue circle was created by one of my dear online scrappy friends when we did a swap some years back and I thought it was perfect for this layout because of the butterfly on it that matched my background paper. (I hope the talented creator will forgive me for forgetting who actually made it and remind me.)
I'll post again with the other layouts that will be displayed in the classroom at Michael's.
Enjoy your day!
Friday, October 19, 2012
3 Cheers for the Teacher!
Hi, everyone.
I have some great news that I'd like to share. Drumroll, please....
Tomorrow afternoon I will be conducting a product demo at Michael's and will soon be teaching scrapbooking classes there. Yippee!
I'm all excited and nervous at the same time.
So if you're in the neighborhood of the Rego Park Michael's on Metropolitan Avenue, come on down. I'll be there at noon!
Wish me luck!!!!!!!
I have some great news that I'd like to share. Drumroll, please....
Tomorrow afternoon I will be conducting a product demo at Michael's and will soon be teaching scrapbooking classes there. Yippee!
I'm all excited and nervous at the same time.
So if you're in the neighborhood of the Rego Park Michael's on Metropolitan Avenue, come on down. I'll be there at noon!
Wish me luck!!!!!!!
Saturday, September 15, 2012
Project Life Products
Just a heads up for those of you doing Project Life. I took a peek at Becky's site and she's got some core kits in stock, i.e., the Clementine and Turquoise core kits. The Cherry Edition is also still available.
She also has journaling grid cards, blank white cards as well as coordinating cardstock cards in both sizes 3 x 4 and 4 x 6.
I'm off to order me some. Yay!
Happy Shopping!!!
Wednesday, August 29, 2012
Imaginisce Ribbon Cutter
I picked up this tool at Michael's a couple of weeks ago not knowing what to expect. I'd seen a video for it but I can be a skeptic so I held off judgment on it. It felt light in my hands and I wasn't really sure it was going to work or even be worth the money. But I had a 50% off coupon so I figured what the heck.
I got it home, popped in the batteries, flipped the switch on and boy, was I surprised. I tested it on some bits of ribbon at first and it worked like a charm. I found it very easy to operate. It not only cuts the ribbon but it seals it as it cuts so the ends don't fray. Can you hear my whoo hoo?!?! I LOVE ribbon, especially satin ribbon, but I'm not a fan of frayed edges. This nifty tool eliminates those pesky threads.
You can cut the ribbon straight, at different angles or even like a snake's tongue, as I call it. I know there must be a better term for that kind of cut but snake's tongue works for me. LOL
The machine is, as I said, lightweight but it's also small so it's very portable. Because it's battery operated, you don't have to worry about cords or having an outlet available. It heats up quickly and makes even quicker work of cutting ribbon. It came in very handy last week when I had to cut 83 ribbons for that thank you card project I previously posted.
I'm really pleased with my ribbon cutter and glad I bought it. Even without the 50% off coupon I'd have been pleased but getting half off is always nice. It proved to be very useful for my big project but even just cutting one ribbon without dealing with fraying edges makes it a useful tool for me.
I got it home, popped in the batteries, flipped the switch on and boy, was I surprised. I tested it on some bits of ribbon at first and it worked like a charm. I found it very easy to operate. It not only cuts the ribbon but it seals it as it cuts so the ends don't fray. Can you hear my whoo hoo?!?! I LOVE ribbon, especially satin ribbon, but I'm not a fan of frayed edges. This nifty tool eliminates those pesky threads.
You can cut the ribbon straight, at different angles or even like a snake's tongue, as I call it. I know there must be a better term for that kind of cut but snake's tongue works for me. LOL
The machine is, as I said, lightweight but it's also small so it's very portable. Because it's battery operated, you don't have to worry about cords or having an outlet available. It heats up quickly and makes even quicker work of cutting ribbon. It came in very handy last week when I had to cut 83 ribbons for that thank you card project I previously posted.
I'm really pleased with my ribbon cutter and glad I bought it. Even without the 50% off coupon I'd have been pleased but getting half off is always nice. It proved to be very useful for my big project but even just cutting one ribbon without dealing with fraying edges makes it a useful tool for me.
Friday, August 24, 2012
Thank you cards
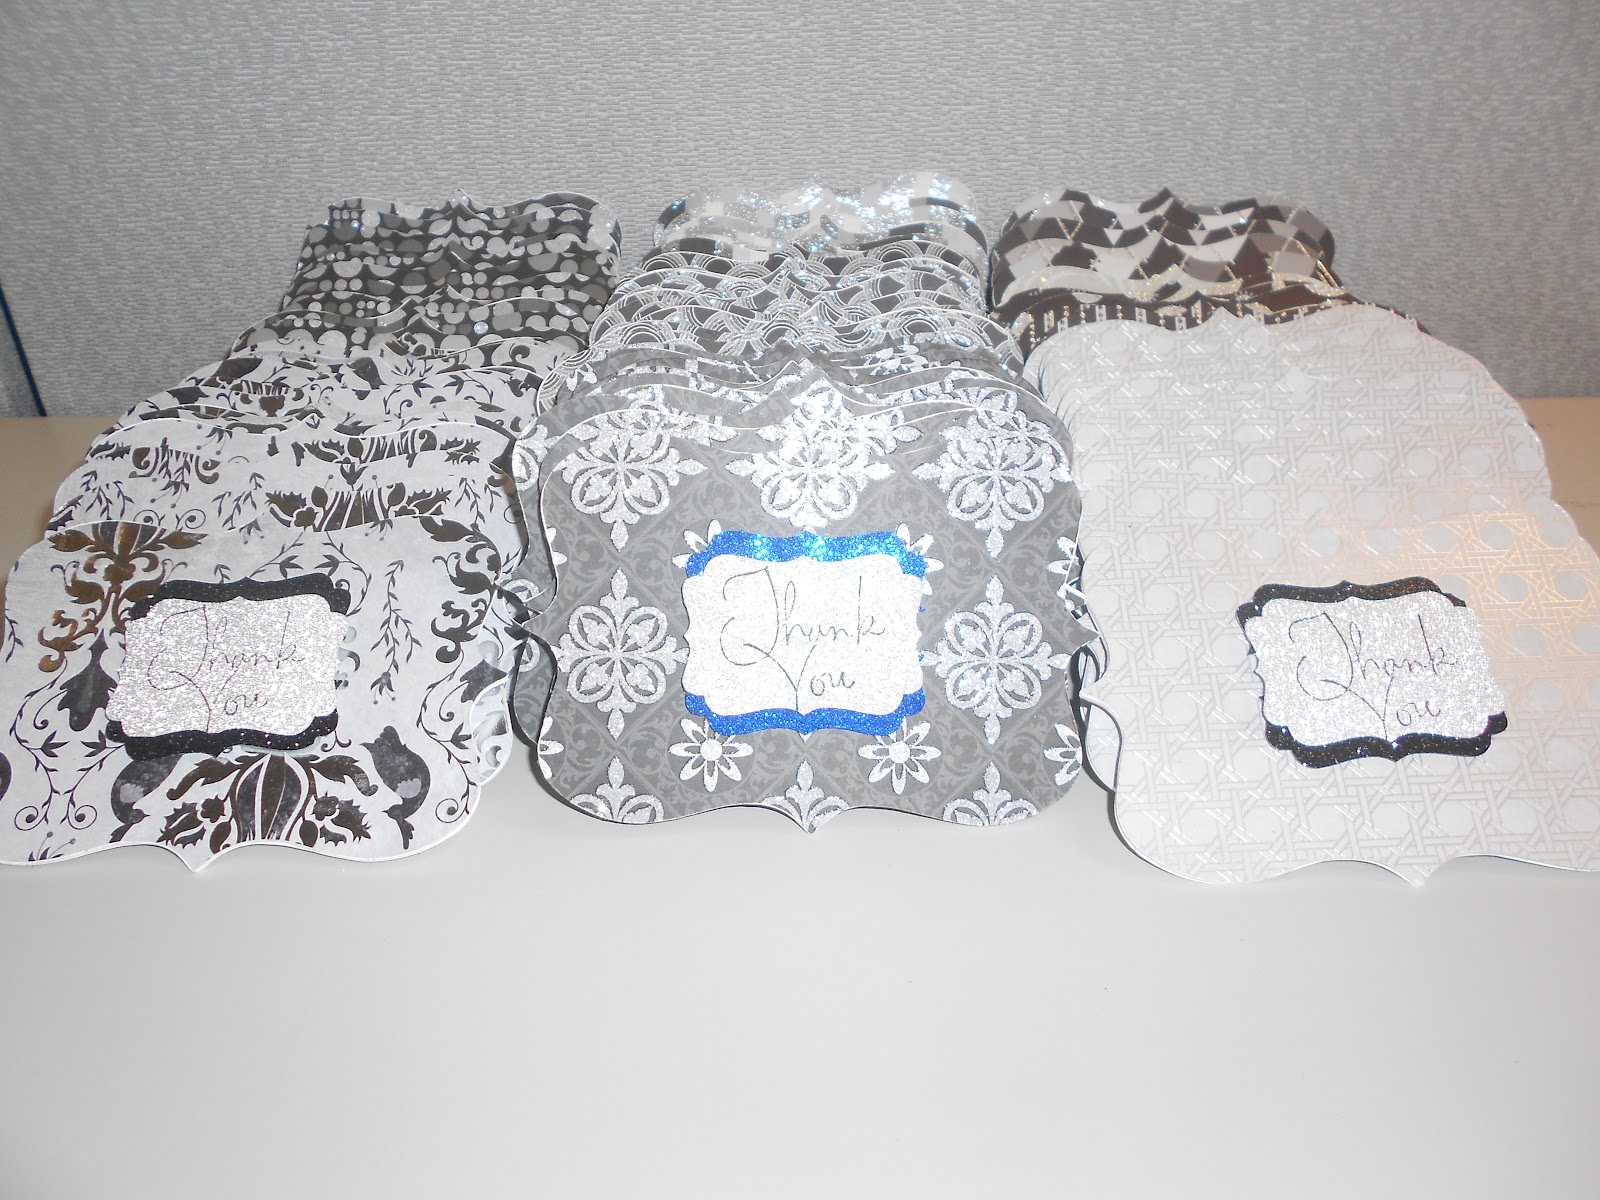
Here are some thank you cards I was hired to make for an upcoming event my office is holding. Originally, the order called for 105 cards but the list was reduced down to 83. While it was nice to be hired again the problem was they didn't want a card, per se, as we had done that last year for this event. Some of you may recall I made 110 cards last year for this same event. They wanted something different this year and this is what I came up with.
I used the SU! top note die and my Big Kick (1st time using the Big Kick). I must admit after sandwiching and cranking that thing 249 times I was tired of that task and was eager to start on a different component of the card.
I cut the top note shape out of 12x12 chipboard first then painted all around the edges with white acrylic paint as I didn't like how the carboardy brown of the chipboard was visible along the edge. Then I cut the front panel from different black and white patterened DCWV paper. Our company colors are black and grey so I needed to stay in that color scheme. I am officially out of black and white pp after this task. Boy, how I wish we had more vibrant colors in our logo but there's something to be said for the elegance of black and white especially when some glitter is mixed in. The pictures don't do them justice but they look really pretty in person.
I had a stack of DCWV Dazzle glittered paper that I've been saving for quite a while now. That thin stack was just too pretty to use. It's utterly fabulous because you can stamp on the glittered paper and that's just what I did. I initially stamped the thank you image on the glittered paper and then used my SU! punch to punch it out but I quickly realized if I wanted to get the maximum amount of punched pieces out of those 2 sheets which is all I had, I needed to punch them out and then stamp the image.
Now, here's where my SU! demonstrator, Melissa, will be proud of me. Heck, I'm proud of me! LOL I'm not that much of a stamper so this was huge for me. I stamped the thank you image onto vellum cardstock first, then used my stampamajig tool to carefully position and stamp the image onto the punched pieces. It was a bit of a time consuming task but by doing it that way, I was able to have enough pieces for the 83 cards.
I also punched the same shape out of blue and black glittered paper but then split them down the middle to create a frame for the thank you piece. All three pieces are pop-dotted to add dimension. I got away with using the blue glittered paper because my company ribbon is royal blue and it's a good thing too because I ran out of the black glittered paper.
I then die cut 83 back panels out of SU! whisper white cardstock onto which I hand wrote the sentiment. I initially was using my ATG to apply the front panels to the chipboard piece but it made the edges sticky with tape overlap so I switched to tombow liquid glue which avoided the sticky edges from tape overlap but not the sticky fingers I soon had. Nothing some wet wipes couldn't handle, though.
Here's a finished shot of them stuffed into the envelopes. I placed a tiny glue dot on each envelope flap to keep it closed. Then I went down to our shipping dept. and boxed them up for overnight delivery to the event.
So that's my latest project.
Have a great weekend!!!
I used the SU! top note die and my Big Kick (1st time using the Big Kick). I must admit after sandwiching and cranking that thing 249 times I was tired of that task and was eager to start on a different component of the card.
I cut the top note shape out of 12x12 chipboard first then painted all around the edges with white acrylic paint as I didn't like how the carboardy brown of the chipboard was visible along the edge. Then I cut the front panel from different black and white patterened DCWV paper. Our company colors are black and grey so I needed to stay in that color scheme. I am officially out of black and white pp after this task. Boy, how I wish we had more vibrant colors in our logo but there's something to be said for the elegance of black and white especially when some glitter is mixed in. The pictures don't do them justice but they look really pretty in person.
I had a stack of DCWV Dazzle glittered paper that I've been saving for quite a while now. That thin stack was just too pretty to use. It's utterly fabulous because you can stamp on the glittered paper and that's just what I did. I initially stamped the thank you image on the glittered paper and then used my SU! punch to punch it out but I quickly realized if I wanted to get the maximum amount of punched pieces out of those 2 sheets which is all I had, I needed to punch them out and then stamp the image.
Now, here's where my SU! demonstrator, Melissa, will be proud of me. Heck, I'm proud of me! LOL I'm not that much of a stamper so this was huge for me. I stamped the thank you image onto vellum cardstock first, then used my stampamajig tool to carefully position and stamp the image onto the punched pieces. It was a bit of a time consuming task but by doing it that way, I was able to have enough pieces for the 83 cards.
I also punched the same shape out of blue and black glittered paper but then split them down the middle to create a frame for the thank you piece. All three pieces are pop-dotted to add dimension. I got away with using the blue glittered paper because my company ribbon is royal blue and it's a good thing too because I ran out of the black glittered paper.
I then die cut 83 back panels out of SU! whisper white cardstock onto which I hand wrote the sentiment. I initially was using my ATG to apply the front panels to the chipboard piece but it made the edges sticky with tape overlap so I switched to tombow liquid glue which avoided the sticky edges from tape overlap but not the sticky fingers I soon had. Nothing some wet wipes couldn't handle, though.
Sorry for the overexposed picture here. I took this pic in my office before boxing them up and shipping them out to the event. Lighting is not the best in my office as we have no windows.
Also don't know why this came out so blurry.
Last year we just placed the card into the gift bag but again, they wanted something different this year so this was my solution. I cut measured slits in the front of the envelope and then ran our company ribbon through the slits. This took a while to figure out the measurements and then an even longer while to cut the slits. I had to place chipboard into the envelope before cutting to make sure I didn't cut through the back panel of the envelope. I left enough length on each end so the envelope containing the card could be tied to the handle of the gift bag thus allowing it to hang on the outside of the gift bag. They absolutely loved this idea because it put our logo front and center. As you can see, I also addressed each envelope.Here's a finished shot of them stuffed into the envelopes. I placed a tiny glue dot on each envelope flap to keep it closed. Then I went down to our shipping dept. and boxed them up for overnight delivery to the event.
So that's my latest project.
Have a great weekend!!!
Monday, August 6, 2012
Newest Wedding Mini Album
Well, here's my latest mini that I completed this past weekend while I hibernated in the house away from the heat and yucky humidity outside.
I did some new things in this book. I love incorporating new stuff in my books. Not only does that make them more interesting but it keeps me from getting bored.
I did some major layering on the "W" page but stoopid me forgot to take an individual picture of it. Please forgive the stinky picture below. There's some bad glare going on there but lighting is always a problem for me in this house. This is the back of the "W"
"E" back.
"D" front. This page opens up which allows for three pictures.
Here is a shot with the mat open.
"D" back.
2nd "D" front.
2nd "D" back.
"I" front. This mat opens up allowing 3 pictures on this page.
"I" back.
So here on this "N" page I tried something totally new for me. I made a waterfall!!! I'm so proud of this and it actually works. By pulling the glittered embellie tab on the right, the photo mats will open and slide to the left. It's so cool! I just love it. You had to hear my glee when it worked.
I pulled the tab a bit and now you can see the first photo mat is standing. I stamped some journaling lines on the back of it.
Here you can see the back side of the 2nd mat.
Again, I stamped some journaling lines. And as a little surprise, I stamped a silver heart on the tab that is hidden until the tab is pulled. The heart disappears when the tab is pushed back in. Have I said how much I just love this waterfall? Ha! ha!
This mat opens up too and tucks under the embellie to keep it tacked down when turning the pages.
"G" front. I included an organza pouch which slips under the mat. I left some breathing room with this mat to allow for a keepsake in the pouch.
This page has double fold out photo mats which tuck under the flower in the center and jewel brads on the sides.
With the fold outs, this page has room for 10 pictures.
Here is another first for me. I actually used a transparency! I've always been afraid of using these even though I love them. I didn't do a lot on this page because I wanted the transparency itself to be the feature but the mats on both sides are large and allow for a full 4 x 6 picture.
And this is the last page and yet another first for me. I've had a package of borders forever and finally decided to use some of them on this mini. I placed that bottom border but it just looked like it was missing something. It's a pretty border but it was obvious that it needed something more. I spent a lot of time trying to come up with something that would perk up the border. I tried different things to no avail until I came across the I Rock tool and jewels in one of my drawers. It was given to me by a friend named Lisa a while ago but I never used it until now. Thank you, Lisa!!! Silly me for not using it sooner. What a great little gadget it is and those little jewels turned out to be exactly what I needed to finish off that border and page.
Here is a closer look at the border with the jewels. Again, thank you, Lisa, for my nifty I Rock and jewels. No more little bits of glue dots peeking out from under the jewels.
So, there you have it; my latest mini. I hope you enjoyed it and that my customer likes it.
Also hoping you all have a great day!
Sunday, July 8, 2012
New Wedding Mini Album
Happy Sunday! Hope you are all enjoying the day.
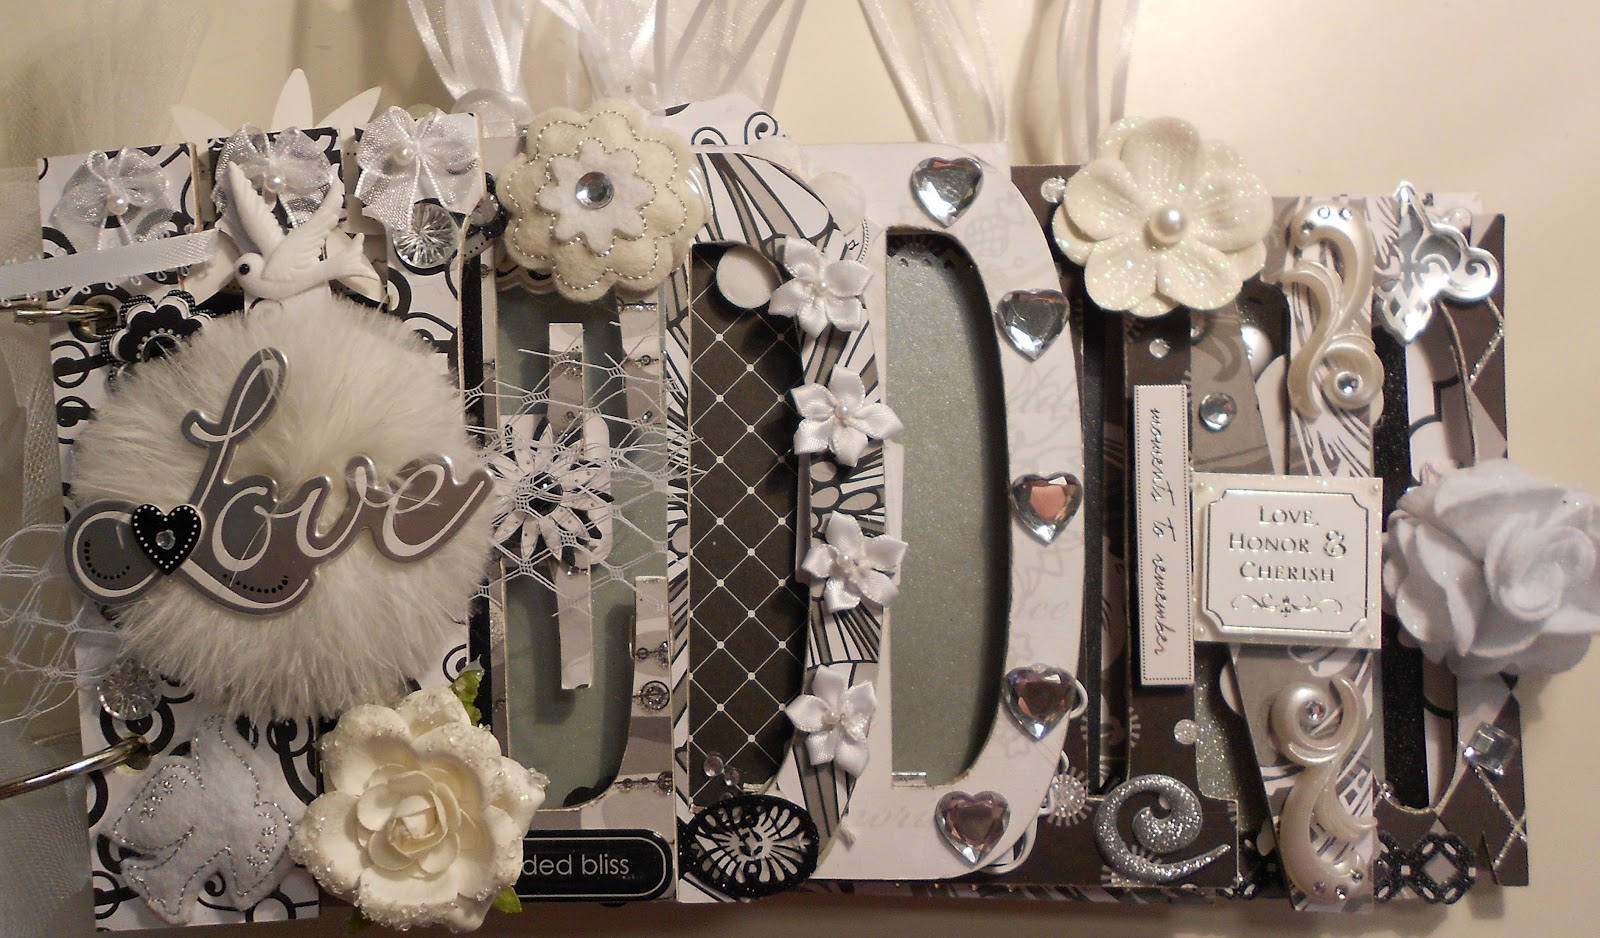
Here's a new wedding mini I made. I'm also working on another now. Seems it's the season for wedding minis.
I used DCWV paper again. The patterns lend themselves so well to a wedding theme. This mini is the second one this particular customer ordered. She's giving it as a gift to the bride.
Here's a new wedding mini I made. I'm also working on another now. Seems it's the season for wedding minis.
I used DCWV paper again. The patterns lend themselves so well to a wedding theme. This mini is the second one this particular customer ordered. She's giving it as a gift to the bride.
This page and some of the subsequent ones have tags behind the photo mats.
This page has a removable organza pouch for keepsake storage tucked behind the photo mat.
I kept this one rather clean and understated with the embellies which will allow the pictures to take center stage.
Ok, so I've got to get back to work on completing the other wedding mini.
Thanks for looking!!!
Subscribe to:
Posts (Atom)